

this post may include affiliate links that qualify us for earnings
If you purchased our 25 or 50 pack of Blank Bookmarks on amazon.com, thank you for your business! If you received a free sample, we hope you enjoy these random, little surprises. If you’d like to buy some, please see our QuickSPI brand bookmark listing on amazon. You can click this link or or the picture below:

QUICK DETAILS for Experienced Designers
- Keep Plastic Film on Until Ready to Sublimate
- Remove Plastic Film from both sides.
- Use Real Sublimation Paper when Sublimating on Polymers
- Apply Design one side at a time – Temp: 350-356° Time: 55-60 Seconds with medium/firm pressure.
- Apply a Fun Tassel – Feed the tassel loop through the bookmark hole and then feed the knot through the tassel loop.
If you are a beginner or new to plastic material sublimation, please read on for more instructions, advanced information, profit potential, and our tips for perfecting these Bookmark Blanks. We appreciate your business and hope we can help you to increase sales!
Free Sublimation Bookmark Template
If you Need a Template for QuickSPI plastic bookmarks, You can Download our FREE Transparent PNG File Here:
Sublimation Blank Bookmark Video
If you want to watch us sublimate a bookmark, here is a quick video, complete with settings, on our youtube channel:
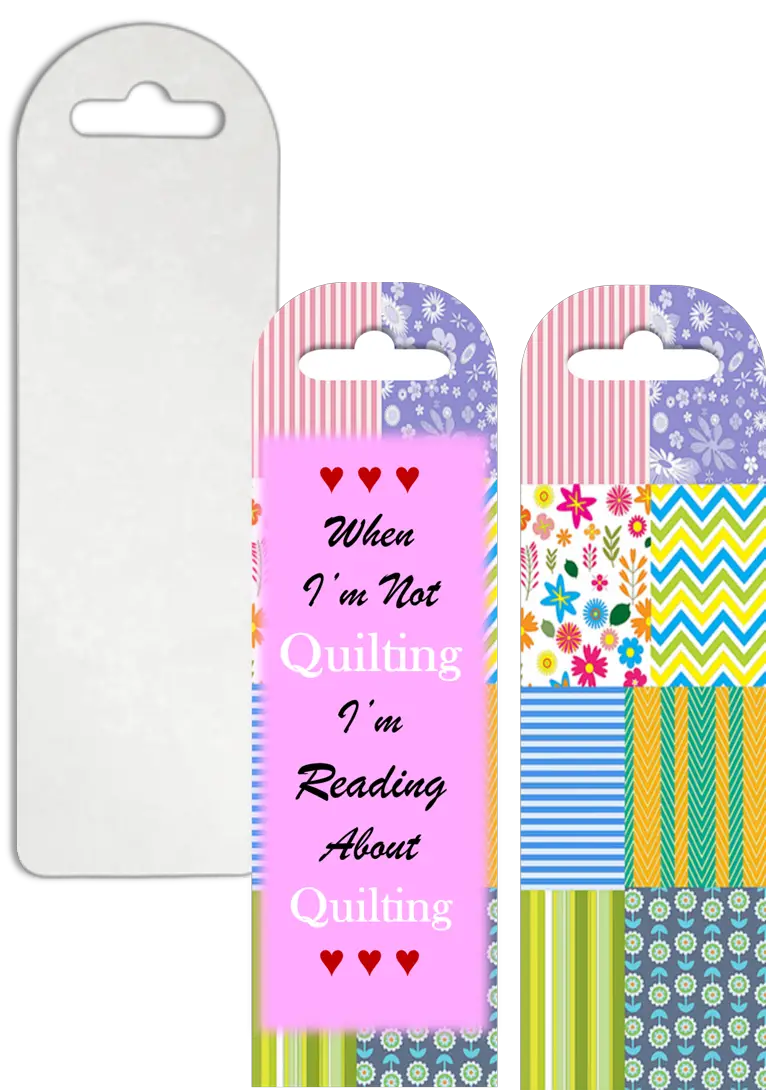
About our Sublimation Bookmark Blanks
Sold in 25 or 50 packs, our bookmark blanks are a hot selling item impulse that nearly everyone can find a use for. Whether it’s books, cookbooks, magazines, crossword puzzles or other games, people like to have a useful bookmark for marking their reading material.
Material Composition
The material is made of a special polymer plastic which allows heat transfer of sublimation ink. Remember: sublimation ink can permanently transfer to polyester and polymers. These bookmarks are polymers.
Features
The bookmarks are very light weight yet durable, kind of like a grocery store “shoppers club” tag, maybe a bit thinner. This is much preferred to heavy cardboard type bookmarks that are susceptible to creases, deterioration, or oil marks.
Problem Reminders
The biggest mistake people make is forgetting to remove the plastic protective film from BOTH sides of the bookmark blank. If it happens to you…well, you’re in good company.
Let’s review a couple of best practices for pressing our bookmark blanks before we move onto our design tips and ways to increase profit potential.
Best Practices for Pressing our Bookmark Blanks

Small blanks such as these bookmarks perform best with clear, vibrant, simple designs or, of course, custom orders. Let’s go over just a couple of best practices.
Save Money on Paper
One great benefit to sublimating small items is that you can get 4 prints from one regular sized piece of paper and 6 from legal size. It’s a good idea to copy and paste your design 3 or 4 times across your paper and print all them all at once.
This is much easier than trying to feed scraps into your printer.
Plastic Film
Leave the film on the bookmark blank until you are ready to sublimate. This keeps dust from collecting on the blank and it reduces scratches and blemishes.
Sublimating Your Design onto Your Blank Bookmarks
Prep Work – Peel the Film from BOTH SIDES
Applying Your Design – Heat Press Temp to 350-356 Fahrenheit
Print your design on real sublimation paper! If you need a bookmark design, we always have a free one available as well as some low cost designs. They will be right sized for the bookmarks!

Fishing Bookmark
This is a READY-to-PRINT Template What You’ll Receive: File Format: PDF (2 Pages) File Quantity: 1 Design: When I’m Not Fishing, I’m Reading About Fishing Spots Per Template: 4 per […]

If you are familiar with your heat press and our sublimation bookmark blanks, you can do more than one at a time. If you are unsure, PLEASE:
Press ONE Blank at a time until you are confident in your settings. Every heat press is different and everyone uses different inks. There is no “right” settings, only good starting points.
- Lay your design face up on a solid work surface and put the blank on top.
- Use a little heat tape to secure the blank to the paper.
- Lay clean blow out paper on your bottom platen and put the ready to sublimate bookmark on top of the blow out paper with the design facing down.
- Cover with clean blow out paper. Your ready to press (bookmark + design) should now be sandwiched between 2 pieces of blow out paper.
- Press for 55-60 seconds at medium pressure.
Final Steps – After Pressing
Allow your blanks a moment to cool and then peel the paper from the bookmark. If you are happy with your results, make a note of your settings for future use.
If you think a lot of ink was left behind, increase your time by 15 seconds until you are happy. Also, make sure you are using real sublimation paper and quality ink with proper inkk profiles.
Lots of people have started using copy paper in order to save money, but sublimation paper such as A-Sub (link to article) is made to hold and release sublimation ink whereas copy paper is made to absorb and hold onto ink. this is critically important when sublimating onto material polymers instead of fabric.
Happy Sublimating!
Where to Now? Back to Homepage or See the Blanks we Sell